Configuration options
Enable Viacam provides a complete configuration options dialogue that allows you to fully customize its operation. This dialogue is divided in two main categories. General options, where you can adjust the camera settings, work with profiles and choose the language, and the Profile options, where you can configure all the application features to best fit your needs.
General options
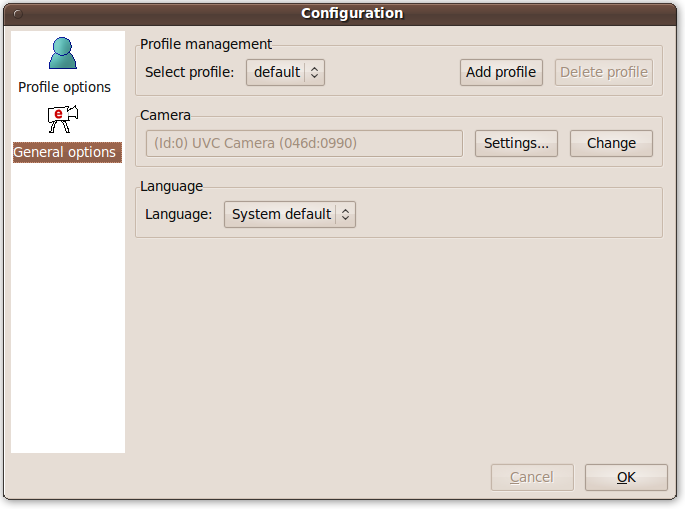
Profile management
Profiles allows you to save or restore by name all Profile options settings. It is useful when many users of Enable Viacam share the same logon session.
- Select profile. Allows you to choose a specific profile or the default one.
- Add profile. Adds a new profile using the configuration options of the current one.
- Delete profile. Deletes a configuration profile. The default profile cannot be deleted.
Camera
- Settings button. Opens a window where you can adjust the camera controls.
- Change button. Allows you to change the selected camera.
Language
Allows you to choose the language.
Profile options
Motion
These values should be properly tuned to obtain the best user experience. It is recommended to follow the Configuration wizard to set them up properly.
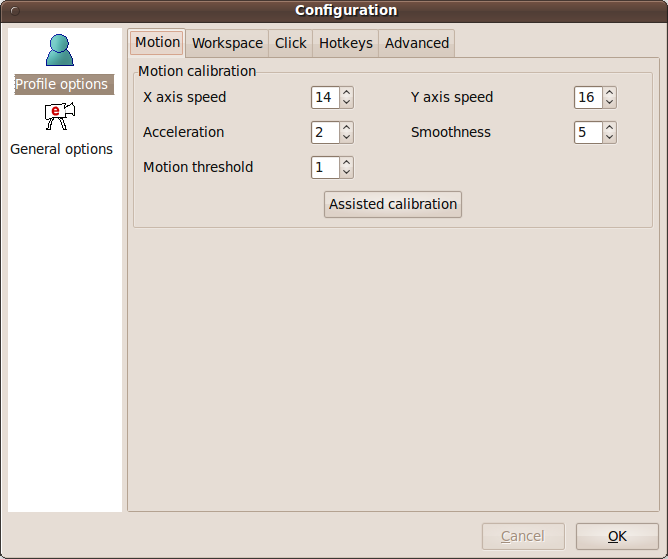
- X axis speed. Horizontal (x axis) pointer speed multiplier.
- Y axis speed. Vertical (y axis) pointer speed multiplier.
- Acceleration. The acceleration increases the speed of the pointer when you move your face faster.
- Smoothness. Filter small tremors. The greater the value, the softer the motion of the pointer.
- Motion threshold. This option makes the task of stopping the pointer easier. The units are pixels of the screen.
- Assisted calibration. This button starts the automatic calibration method. See automatic calibration method for further details.
Workspace
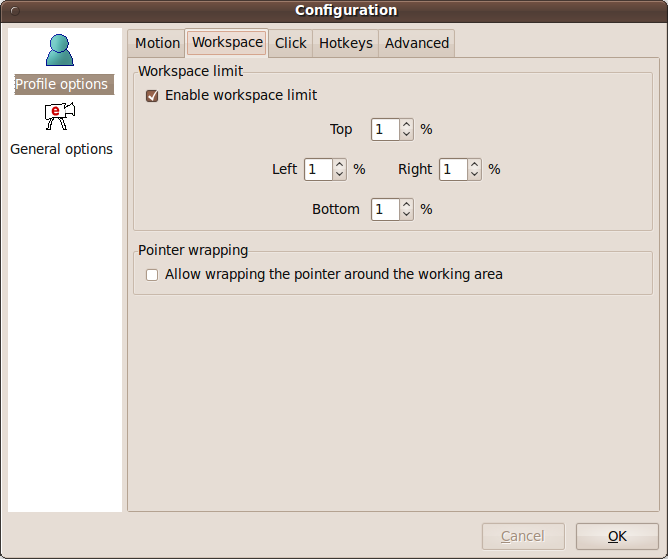
- Enable workspace limit. If checked the pointer can only move within the bounded area.
- Top. Top limit of the workspace (% screen height).
- Left. Left limit of the workspace (% screen width).
- Right. Right limit of the workspace (% screen width).
- Bottom. Bottom limit of the workspace (% screen height).
- Allow wrapping the pointer around the working area. When selected the pointer wraps to the opposite edge of the workspace instead of stopping on it.
Click
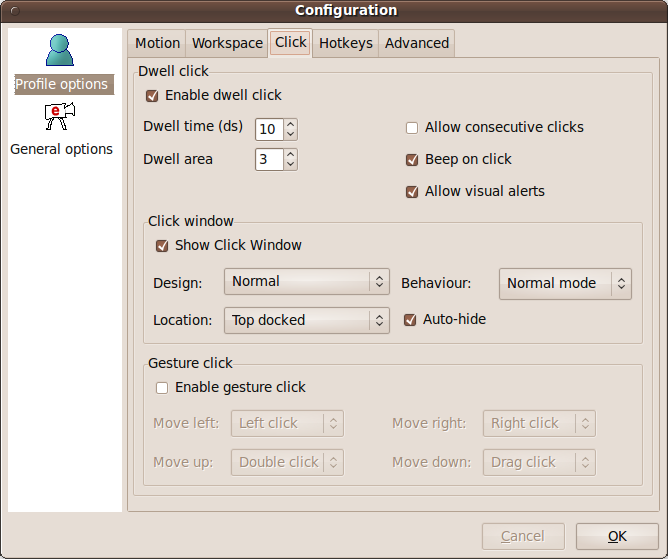
- Enable Dwell click. If checked enable click generation.
- Dwell time. Time to wait (deciseconds) before generating a click action.
- Dwell area. To generate a click it is not necessary to stop the pointer completely. Enable Viacam allows a small movement threshold around the exact position where you want to click. The units are pixels of the screen.
- Allow consecutive clicks. When enabled executes several clicks over the same location while the pointer is stopped.
- Beep on click. If selected a short sound (beep) will be played every time a click is generated.
- Allow visual alerts. Provides visual feedback when dwell click or gesture click is enabled.
Click window
The Click Window is a small bar that allows you to choose the action (left button, right button, drag & drop, and double click) that will be generated when using the Dwell Click mode.
Options of the Click window:
- Show click window. Opens the Click Window.
- Design. Selects the Click Window design. Normal design uses buttons with icons whereas thin design uses text based buttons to save space.


- Behaviour. It provides two different selection modes.
- Normal mode. To select the action that will be generated the next time, simply click one of the buttons. To set the predetermined action (padlock icon) simply make two consecutive clicks on the same button.
- Fast mode. This mode allows you to save one click when selecting actions. To select an action, just hover the pointer over the desired button. To predetermine an action, click once the desired button.
- Location. It allows you to select the Click window positioning. It may be docked on the top, bottom, left or right edge of the screen, floating horizontal or floating vertical.
- Autohide. If selected, the docked Click window will be visible only if the pointer is on it. If the window click overlaps with another bar, a warning message will appear.
The meaning of each button is as follows:
- No click. It allows you to disable click generation. It is a useful for reading a page, document, etc. without being disturbed by undesired click actions. To disable click generation press the 'No click' button. To enable it again, press the button once more.
- Left. Identical function as the left button of a conventional mouse.
- Right. Identical function as the right button of a conventional mouse.
- Drag. Identical function as maintaining pressed the left button (first click) of a conventional mouse and releasing it later (second click). This action allows you to perform the drag and drop function.
- Double click. Identical function as pressing twice the left button of a conventional mouse.
- Hide/Show window. Minimize or restore the main window of Enable Viacam.
Gesture click
- Enable gesture click. If selected enables the gesture click mode. See click modes for further details.
- Move left. Action associated with the left direction gesture.
- Move right. Action associated with the right direction gesture.
- Move up. Action associated with the up direction gesture.
- Move down. Action associated with the down direction gesture.
See also click modes
Hotkeys
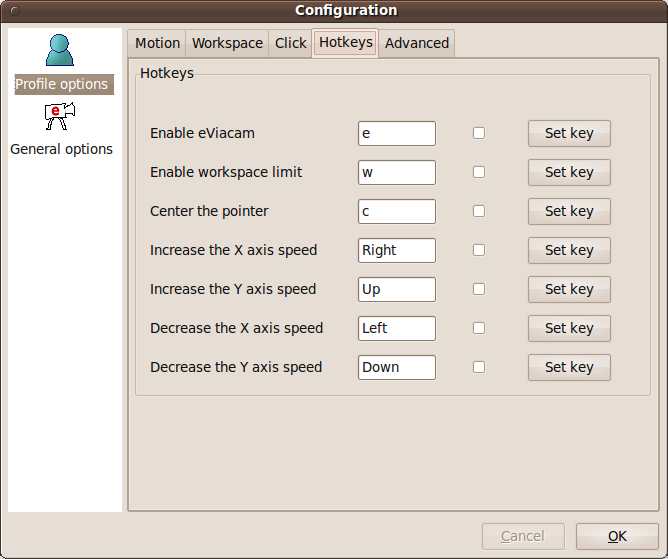
A set of functions can be associated to direct key presses (hotkeys) for faster access. To enable one of them just tick the appropriate check box. Press the 'Set key' button to configure the desired key.
Advanced
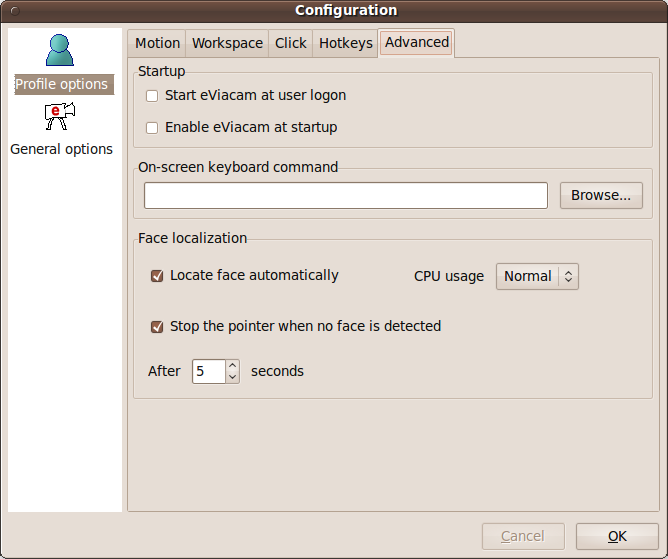
Startup
- Start eViacam at user logon. If selected Enable Viacam will start automatically at system startup (not available on Windows).
- Enable eViacam at startup. If selected eViacam will be automatically enabled once started.
On-screen keyboard command
Allows you to specify command which opens the on-screen keyboard.
Face localization
Enable Viacam is able to detect the presence and location of your face, and centres the tracking area accordingly.
- Locate face automatically. If checked Enable Viacam tries to detect the user's face and automatically centres the tracking area.
- CPU Usage. Adjusts the CPU load that the face detection system will use. Higher values increment the face detection rate but also require more processing time.
- Stop the pointer when face not detected. If selected motion tracking will be automatically disabled when no face is detected after a certain amount of time which can be also configured.
Back to home


